Ray-marching full screen volumetric fog

Introduction

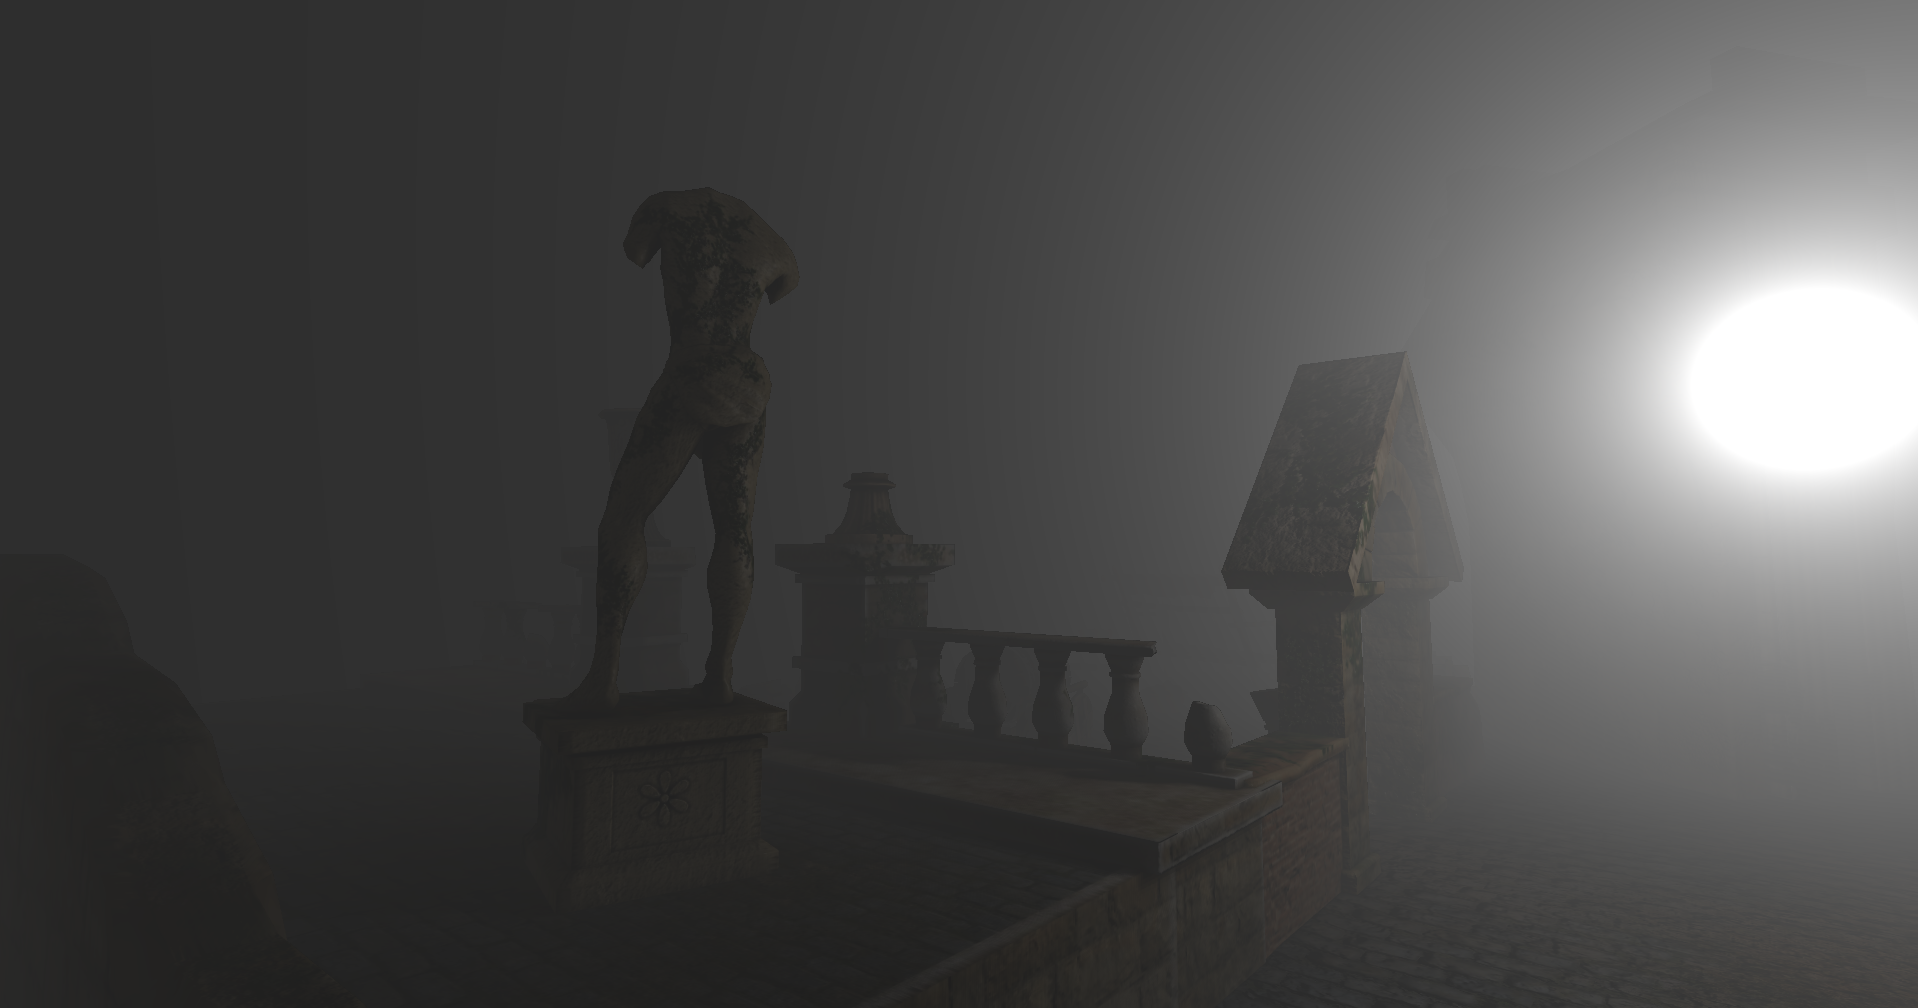
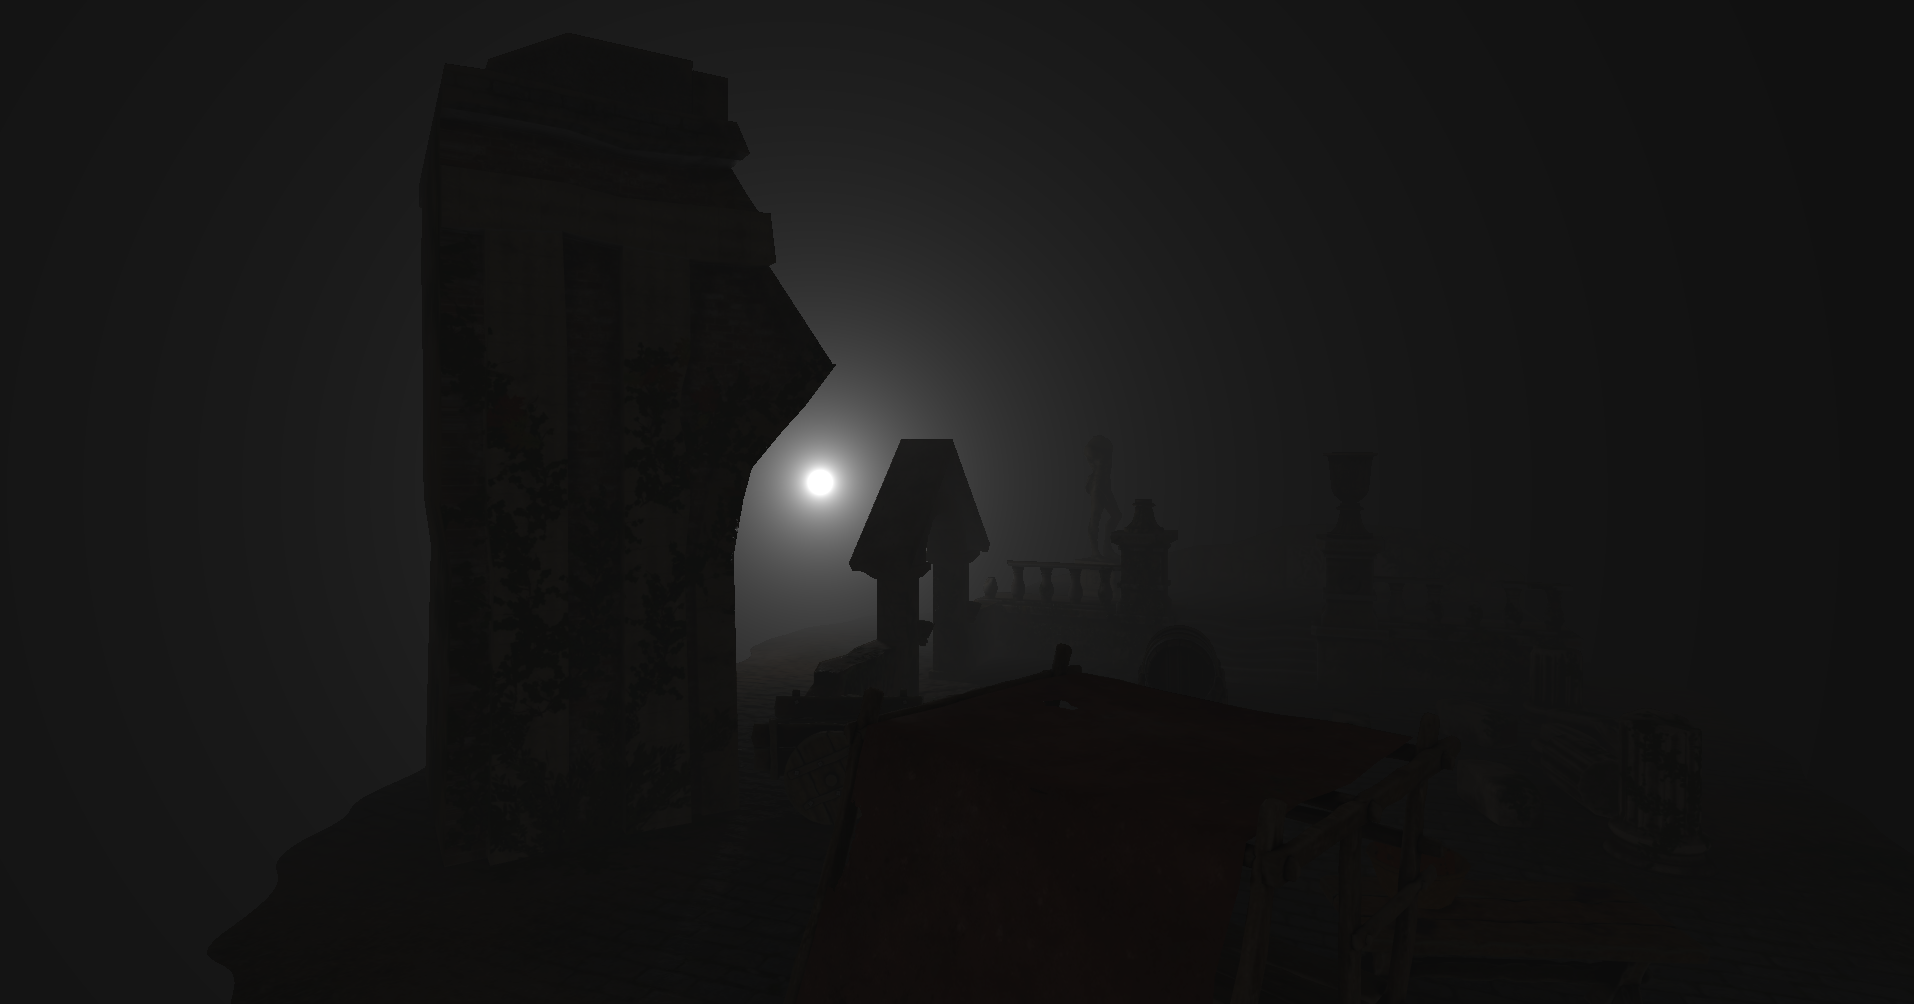
Fog is a graphical feature that is used in games to create atmosphere, depth, tension, and visual hierarchy. There are many ways to achieve the look of fog, some more "faked" than others. Older or lower-budget titles for example may use simple screen-space fog that looks more flat with a linear gradient, which simply fades the scene to a gray or blue color. While this can work for some games, it tends to break immersion when aiming for realism, as it's disconnected from the world's lighting and geometry. You've likely seen more modern implementations of fog in games like Horizon Zero Dawn (also famous for its awesome-looking cloud rendering), Death Stranding and Returnal, where fog interacts dynamically with the world's light and geometry. 
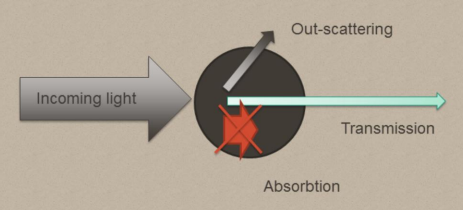
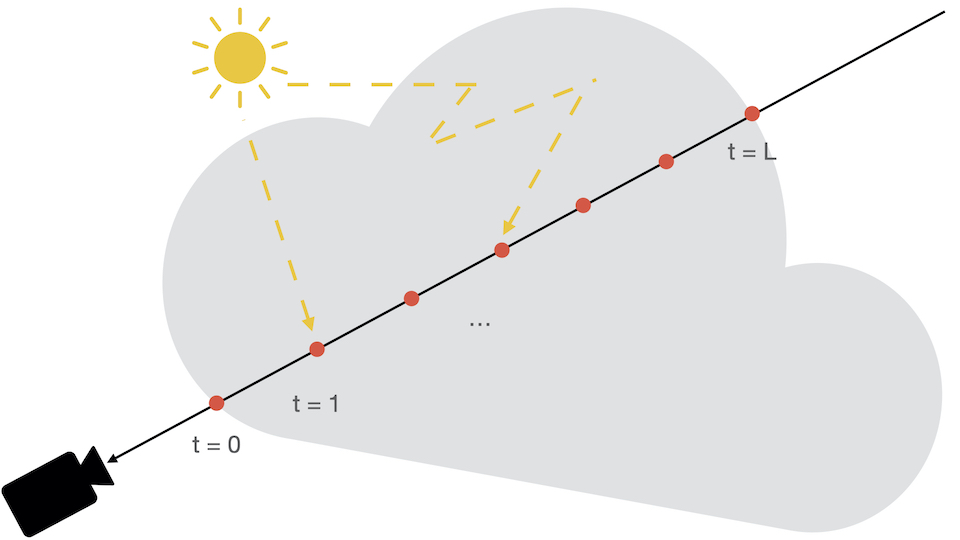
In these implementations, fog is treated as a 3D volume of participating media[1], which is traced through using a technique called ray-marching to simulate light absorption, scattering, soft shadows, and light shafts (also known as god rays).

At the time of writing this article, I'm studying game programming at BUas, where I was given the opportunity to freely choose a topic for an 8-week self-study project. I had always been fascinated by cinematic looks in games and wanted to delve deeper into a graphical feature related to this, which led me to choose to implement an implementation for ray-marched volumetric fog according to the Real-time Volumetric Lighting in Participating Media paper written by Toth and Umenhoffer[3] (from now on referred to as [TU09]).

Prerequisites

In this article I'll be discussing the basic concepts of ray-marching and volumetric fog in real-time graphics and implementing a full-screen volumetric fog effect using ray-marching. My implementation will use OpenGL for rendering and GLSL shader code. I expect you to have experience with graphics libraries, 3D vector and matrix math, a basic understanding of some mathematical notations and implementing a full-screen effect (e.g. bloom). If you feel like you may lack experience in these topics, I recommend following the LearnOpenGL tutorials[2] first.

I often find myself struggling to dig through long tutorials or papers myself, so I'm aiming to keep this straight to the point and fairly easy to follow. Since rendering fog in games is such a large and complex topic, I'll provide links to resources throughout and at the end of the article for more in-depth explanations and others tutorials to read through if this piqued your interest.

What is fog?

I already briefly touched upon this during the introduction, but in this implementation, fog is a 3D volume of participating media[1]. This volume can be seen as a space that is filled with tiny particles that absorb and scatter the light photons colliding with them. When we render fog, we want to calculate the final brightness and color of the light reaching the camera after simulating the light travelling through the volume. This final result is called radiance and is influenced by the following:

  • Absorption: light that gets absorbed and essentially removed from the path by the particles - doesn't reach the camera/eye
  • Out-scattering: light that gets scattered out of the volume by the particles - doesn't reach the camera/eye
  • In-scattering (not shown in diagram): light that gets scattered into the view direction by the particles - reaches the camera/eye
  • Transmittance: the amount of light that neither gets scattered nor absorbed and makes it through the volume unscathed - reaches the camera/eye

Ray-marching

So, how do we sample the fog and calculate all these things? We'll use a technique called ray-marching. When ray-marching volumetric fog, we shoot a ray from the camera through the volume and essentially "march" along the ray on regular intervals and accumulate data on how much the fog affects the light travelling through it on each point.

In our application, we'll be applying this technique in a full-screen shader by shooting a ray per pixel into the scene and marching along it. Since we'll assume fog to be present everywhere in the scene, we'll march from start (camera) to finish (where the ray hits the scene) to accumulate data. To find where the ray hits the scene, we can sample the depth buffer using the current pixel's UV coordinate and reconstruct that point's position from the depth value[9]. To prevent us from marching 'infinitely' along a ray when it doesn't hit the scene, we can clamp the ray distance with a ray zfar value.

Translating all this into shader code, it will look something like this: Nice, we're marching along a ray now, so let's start calculating how much light reaches the camera on each step.

Calculating Radiance

So how do we calculate radiance? There are several physically based formulas to estimate the final radiance after simulating the absorption and scattering of light through a fog volume. For this implementation, we'll be following a formula similar to the one used by [TU09]. I chose to deviate from their implementation, as their formula is for backward ray-marching (ray-marching from the scene towards the camera) rather than forward ray-marching (ray-marching from the camera to the scene). I chose to implement forward ray-marching instead, as it comes with some benefits like allowing for a fairly simple optimization by early-out when the transmittance of a volume gets too low[8].

The formula I followed for this implementation consists of integrating[8] the in-scattering * transmittance over the range of our ray. Since there's no accurate solution to this formula, we'll be approximating this integral instead using the Riemann sum method[10]. Before we dive into how this ties in with our ray-marching, let's look at the formula first:

Let's dissect it going from left to right:

  • L is the calculated radiance
  • ΣNn = 0 is the sum of the function's result per step n
  • Li(x(ln), ω) is the in-scattering term calculated per step n
  • e-τln is the transmittance calculated for a ln total distance travelled over the ray
  • Δl is the ray-march step size
In essence, per step in our ray-march, we'll be summing up the result of the in-scattering * transmittance * step size.
Now, let's combine this formula with the code we already have: The only calculation we're missing in our code now is the in-scattering term.

Calculating In-scattering

As mentioned previously, the in-scattering is the light that gets scattered into the view direction by the volume. In the case of ray-marching, it's how much of the light gets scattered into the point we're sampling on the ray. To calculate the in-scattering, this formula is presented by [TU09]:

This formula might look a little intimidating, so I'll try to dissect it as clear as I can, going from left to right:

  • Li ( x , ω ) is the calculated in-Scattering
  • τ (Greek letter Tau) is the density: the thickness of the fog at a point. Since we're going for uniform fog in this implementation, this will be constant. For other implementations, take something like a smoke cloud; this will be either procedurally generated, sampled from a texture, or another file like OpenVDB[4][5]
  • a is the Scattering Coefficient: The probability of the light photon scattering after collision
  • Φ (Greek capital letter Phi) is the point light intensity
  • 4πd2 where d is the distance between the considered point and the light source
  • v(x) is the visibility of the sample point from the light source. In our implementation this will be 1, as I don't expect you to have point light shadow mapping in your application. However, if you do have it, feel free to sample the shadow factor from the light's cube shadow map and see what happens!
  • e-τd is the transmittance calculated for a d distance between the light position and the sample point. You should recognize it from the radiance formula, as it is similar, but in our shader implementation we will be using different distances to calculate the transmittance to be used in each formula
  • P( ω , ω ) is the phasing function[7] describing the probability density of the scattering direction. There are many different phasing functions used for different types of particles, which I won't go in-depth on. For my application, I use an approximation of the Henyey-Greenstein phasing function. The original function is used to model realistic fog/smoke but can be expensive to calculate. The Schlick phase function approximation of HG is often used in real-time applications as a substitute, as it's faster and approximates HG well enough.
Well, this is a lot, so let's break this down into a code sample: Combining this with all other shader code presented before, this is the full shader (click button to collapse). This shader is neither written for a compute pass nor a graphics pass, since I expect you to adjust it to your application:
Full volumetric shader
When running this, without the volumetric calculations being affected by shadows, it can look something like this:

Personally, I had to play around a bit with the light intensity to get this result, so I encourage you to do the same. All the uniform variables provided in the shader code can also be made editable, and I encourage you to play around with the values to see what it looks like with higher density, a different k-value, different scattering color, etc.!

Jittering our samples

Right now, our implementation might look off from some angles since you can see individual 'slices'. Maybe if you've played around a bit with the step size variable, you've noticed that the smaller the step size, the smoother the fog looks (and... the slower your application runs). If you've implemented shadow mapping to sample from for the visibility factor in the in-scattering function, you'd have definitely noticed this.

This slice issue is caused by us marching our rays with the same step size, starting at the same point. Each ray we're marching has samples on the same 'slice' as the other rays. We can "fix" this slice issue by jittering our samples, by adding a (pseudo-)random amount of delta step to our ray's starting position: After adding this, it will look smoother, with a trade-off that it can look noisier on bigger step sizes:

There are still some banding issues present, especially if you look in the distance, but they're less and less noticeable. To further tackle this, we can jitter every sample on a ray. If you'd like to check out how to do this, I recommend looking at this scratchapixel chapter.

Thank you for reading!

I hope you learned more about fog, ray-marching, and how to calculate the radiance and transmission from reading my article! I personally had a lot of fun working on this project and writing this. This is only one part of what I worked on for my self-study; I also implemented local fog volumes, varying density using noise textures, and some optimizations.
If you're interested in expanding your own application similarly, or in other ways, here are some ideas:

  • God rays using shadow maps: if you haven't already, I recommend checking this out, as it gives cool-looking results with relatively low effort. A tutorial I used for implementing point light shadow mapping is this chapter on LearnOpenGL.com.
  • Making the fog volume non-uniform: there are several ways of going about this. I only scratched the surface of this as well in my own application, which I implemented following this awesome chapter on scratchapixel.com. They also have another chapter on rendering volumes based on 3D voxel grids, where they end up using fluid sim data for the density, creating a smoke plume animation. On the topic of voxels, here's a cool video by Acerola, who tried to replicate shooting through fog.
  • Optimizing the fog: you might've noticed that when running the application, the frame time taken for the fog is quite hefty. This is most likely because of the number of steps we're taking when ray-marching, calculating radiance on each step. There are some common optimization techniques you can look at; some include making the fog local (only ray-march when inside a volume), rendering the fog on a lower resolution and upsampling it, early-outing when transmission gets too low, and increasing step size when sampling further away from the camera. There are many more, so I encourage you to browse the net and see which one will get you the most gains (or seems the most fun to implement!).